New blog home

The blog can now be found at http://syndbg.github.io .

Reasons for switching?

  • I realized I don’t need a full CMS for my simple blog needs. A static site generator like Pelican is enough.

  • More potential? Definitely. (Pelican + Github pages) It’s still free and I can customize everything from the core. Definitely better than the online wordpress limitations.

  • Python. Yes, Python > PHP.

Atom: a potential replacement of Sublime Text 2/3

Github Atom’s website and How to get Atom for Linux

Sublime Text 3’s website and How to get Sublime Text 3 for Linux


Disclaimer: Atom still has to live through the v1.0 release. It’s still in a beta (sort of), so there could be bugs


I’ll start with a  list the problems I see in Sublime Text 3 and Atom’s solution.

1) Contributing is hard

However Atom is open sourced under MIT license and you can directly contribute through the atom github repo.

2)  Lack of package control and other necessary packages from the get go

The most popular Sublime Text 2/3 plugin for so much time (Package Control), still isn’t added to Sublime Text 3 by default. This, plus other plugins are lacking in the default.

However Atom has the most needed Sublime-like plugins installed.

3) After effects of Package Control – total packages disarray

The github team does one thing perfectly right, they handle the packages/themes sharing, but also make publishing extremely easy. As seen here. The team also released  an Atom package

4) Overcomplicated settings as packages increase. Drop-down menu madness suggested?

As installed packages increase, Sublime Text 3 adds more and more drop-down menus, while also increasing the json settings files. All results to a cluster of settings in JSON files. While JSON is easy to use, it doesn’t beat the native 2 clicks GUI enable/disable menus in Atom.


Bonus points for Atom

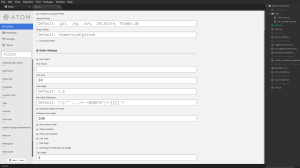
Core settings done right.

Atom core settings

Atom core settings

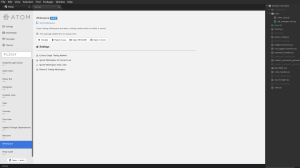
Easy individual package settings control.

Atom settings

Atom settings


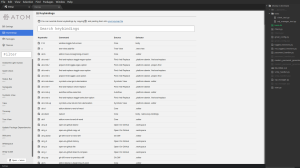
Sublime Text 2/3 key bindings carried over, plus super easy cheatsheet-like options.

Atom keybindings

Atom keybindings

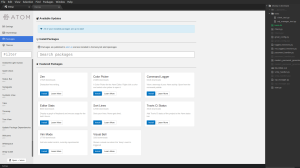
Package control has its attention and it’s integrated well

Atom package control

Atom package control

Themes are themes and don’t mix with packages. Also way easier management.

Atom themes

Atom themes


HOWEVER! Many plugins have yet to see an implementation to Atom, so it might be too early for some really plugins-dependent Sublime users to switch. The good thing is that the GitHub team progresses at a steady pace, Atom gains more and more interest and it won’t be long until plugin developers port their plugins for Atom.

Python 3 How to: Write Unit tests (PyUnit, pytest, nose)

In the following blog post I’ll cover the following frameworks for unit testing.

1) PyUnit, also known as unittest in the Python modules.
2) Pytest – a mature full-featured Python testing tool that helps you write better programs.
3) Nose – a nicer testing for Python? It’s more like a unit test loader since it supports all the above for loading.

How to get them?

1) PyUnit – already installed for you. Just import unittest in your unit tests file

2) Pytest – devs guide -> here

3) Nose – devs guide -> here


Get to know TDD:

TDD – Test-Driven Development or also known as Red, Green and Refactor. Can be explained simple in a image.

TDD


How to start writing tests with PyUnit:

1) Import unittest

2) Import the code you want to test

3) Create a class that inherits  from unittest.TestCase

4) Create methods for the class you created that MUST start with test

5) Run the tests with the python3 interpreter in the console or your IDE


Useful methods to know (framework’s API)

Unit test source code

And when run in the terminal

Terminal PyUnit


How to start writing tests with Pytest:

1) Install pytest

2) Import the  code you want to test

3) Write test functions, it’s optional to create a class with methods.

4) Run the tests with py.test in the console


For Pytest all you need to know is how Python 3’s assert works.  Read a little more about Pytest and assert

Unit test source code (framework’s API)

And when run in the terminal

Terminal pytest


How to start writing tests with Nose:

1) Install nose

2) Import the  code you want to test

3) Import nose.tools

4) Create a class that starts wtih Test

5) Create tests (methods) that start with test

6) Run the test with nosetests in the console


Useful methods  to know . (framework’s API)

Most of the time you’ll use:

*  ok_ which is a short-hand for assert

*  eq_ which is (a, b) and tests if a == b

Unit test source code

And when run in the terminal

Terminal Nose

Python 3 How to: Code coverage (nose way included)

First of all, you must download and install coverage.py with pip.

The steps are:

1) First have written tests for the Python program you want to test
2) Run code coverage on the unit tests you’ve written.
3) Export the report to html for better readability and more details.

and in code:

coverage run test_something.py
coverage report -m
coverage html

The code coverage can now be found in a directory htmlconv/ which is in the same directory where you run the coverage commands. Open htmlconv/index.html and see the detailed html version of the code coverage.

Note: the -m argument is to show a tab for the missing code coverage

And how it looks in action:

The nose way

1) You must have nose installed. (pip install nose)
2) Again, you must have written unit tests.
3) Run the code coverage on the unit tests. Done! All in one command 🙂

and in code:

nosetests --with-coverage --cover-html test_something.py

The code coverage can now be found in a directory cover/ which is in the same directory where you run the coverage commands. Open cover/index.html and see the detailed html version of the code coverage.
Note: Nose code coverage doesn’t include the unit test file in the code coverage. To include it add --cover-tests to the command you execute.

Linux: How to customize your terminal

In this short tutorial, I’ll tell you how to modify your bash into something more useful for you.

You can customize your terminal’s colors, background, title, cursor and bash prompt.

To customize your colors:

1) Open the Terminal Menu

2) Navigate to Edit Profiles

3 ) Create a new profile and Edit it

4) After you’ve done editing it, make sure you set Profile used when launching a new terminal to your new profile’s name.

To customize your bash prompt (PS1):

We’ll use the great bashrcgenerator.com

1) Open bashgenerator and make your dream PS1

2) After you’re done, open the terminal’s settings. Write sudo gedit ~/.bashrc

3) First of all save your current .bashrc to .bashrc_backup , just in case things don’t work out from the first time.

4) Find PS1 in .bashrc and replace it with Your generated .bashrc PS1 and additional functions from bashgenerator.

5) Close any terminal instances

6) Open a new terminal and rejoice.

If things didn’t work from the first time, replace the non-working .bashrc with the .bashrc_backup and try again!

If you just want ready to use, awesome PS1, and the colors are Tango:
Screenshot from 2014-03-13 13:20:54

PS1="\[\e[00;33m\]\u\[\e[0m\]\[\e[00;37m\] \[\e[0m\]\[\e[00;31m\]@\[\e[0m\]\[\e[00;37m\] \[\e[0m\]\[\e[00;33m\]\w\[\e[0m\]\[\e[00;37m\]\n\[\e[0m\]\[\e[00;31m\]>\[\e[0m\]"
Extra round: Show current git branch

Add an extra function in the .bashrc file
# show git branch
parse_git_branch()
{
git branch 2> /dev/null | sed -e '/^[^*]/d' -e 's/* \(.*\)/(\1)/'
}

And somewhere in the PS1 add the following: \\$(parse_git_branch)

Complete PS1:
PS1="\[\e[00;33m\]\u\[\e[0m\]\[\e[00;37m\] \[\e[0m\]\[\e[00;31m\]@\[\e[0m\]\[\e[00;37m\] \[\e[0m\]\[\e[00;33m\]\w\[\e[0m\]\[\e[00;37m\] \$(parse_git_branch) \n\[\e[0m\]\[\e[00;31m\]>\[\e[0m\]"